How to Conduct a Basic Burn Test

What Is Burn Testing?
Burn testing is the process of evaluating a finished candle’s performance from the first burn to the last. The purpose is to confirm that the candle burns safely and consistently, produces minimal soot, and performs as intended for the end user.
Every component of a candle affects how it burns, including the wax type, fragrance oil, fragrance load, dye, wick selection, and container size and shape. For this reason, every candle formula should be burn tested before gifting or selling.
Because natural materials—especially soy and other natural waxes—can vary from batch to batch, it’s best practice to re-test candles periodically. Reviewing your existing candle line at the start of each season, or at least twice a year, helps ensure consistent performance.
This guide walks you through how to burn test your candles, what to observe during testing, and how to troubleshoot common issues.
Items You’ll Need
Finished candle, cured for at least 24 hours
Ruler
Scissors or wick trimmers
Burn test notecard or notebook
Smartphone or camera for photos
How to Conduct a Burn Test
1. Prepare Your Testing Area
Choose a comfortable location where you can remain present for the entire burn cycle. Never leave a burning candle unattended. Place the candle on a clean, flat, heat-resistant surface in a draft-free area. If testing multiple candles, space them 3–6 inches (7.6–15.2 cm) apart.
2. Label Each Candle Clearly
Record all relevant details, including:
Wax type
Fragrance oil and load
Dye type and amount
Wick type and size
Container type, diameter, and shape
Using burn test notecards or labels can help keep your records organized.
3. Trim the Wick
Before lighting, trim the wick to ¼ inch (6 mm). Use a ruler to measure accurately and sharp scissors for a clean cut. Always trim the wick before every burn cycle.
4. Light the Candle and Observe
Light the candle and note the start time. Observe the candle throughout the burn, checking in hourly to record your findings. Setting timers can help with consistency. Always extinguish the candle after four hours.
5. Extinguish, Cool, and Repeat
After four hours, extinguish the candle and allow it to cool for at least five hours. Repeat the process until approximately ¼ inch (6 mm) of wax remains.
Each burn cycle will behave differently, especially as the wax level lowers and heat builds in the container. Burn testing evaluates performance across the entire life of the candle—not just the first few burns. Since customers burn the entire candle, testing the full candle is essential.
Pro Tip: Don’t draw conclusions too early. Wick performance becomes clearer after several burn cycles.
What to Look for While Burning
When evaluating a candle, consider the melt pool, soot, and flame together rather than individually.
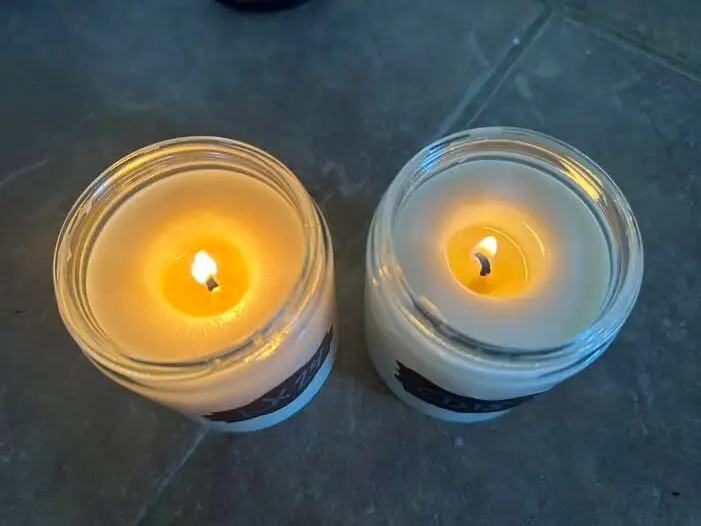
Melt Pool
After 3–4 hours, the melt pool should reach close to—but not necessarily touch—the container edge (within about ¼ inch / 6 mm).
A small amount of wax left on the sides is normal and often melts away by the third or fourth burn.
Ideal melt pool depth is typically ¼–½ inch (6–13 mm), though slight variation is acceptable.
Avoid judging melt pool performance too early; it develops more fully as the candle burns down.
Soot
Some soot is normal—it’s simply carbon burning off the wick.
Soy and other natural waxes usually produce white soot, which is harder to see.
Paraffin wax produces darker, more visible soot.
Occasional small puffs of soot are normal.
Frequent heavy soot or buildup on the container may indicate overwicking, excessive fragrance load, or certain fragrance oil characteristics.
Flame Size and Behavior
Most flames average about 1 inch (2.5 cm) tall; up to 2 inches (5 cm) can still be normal.
The flame should remain relatively steady, with minor movement.
As the wax level drops and heat increases, some additional movement is expected.
Excessive flickering may signal a draft—try adjusting your testing location.
Frequently Asked Questions
Do you recommend power burning?
No. Burning a candle longer than four hours can overheat the container, increase the risk of breakage, and burn off fragrance too quickly. Instead, educate customers on proper candle care, including wick trimming and burn-time limits.
Can I change the wick mid-test if it’s not working?
No. Switching wicks mid-test does not accurately represent real-world performance. Wicks become saturated with wax and fragrance as they burn, and replacing them disrupts this process.
What if my wick mushrooms?
Some mushrooming is normal, especially with CD and ECO wicks. Excessive mushrooming—where carbon falls into the melt pool or the wick bends—may indicate overwicking. Always trim wicks to ¼ inch (6 mm) to minimize mushrooming.
Does paraffin wax produce more soot than natural wax?
Paraffin produces darker, more visible soot, while natural waxes produce lighter soot that’s harder to see. Both are normal in small amounts.
There’s unmelted wax along the container edge—do I need to wick up?
A small amount of wax hang-up is normal. If, after the fourth burn cycle, a thick ring of wax remains, wicking up may be necessary.
Should I test hot throw during burn testing?
It’s best to finalize wick selection first. Testing hot throw too early can be misleading, especially if the candle becomes overwicked later. Evaluate hot throw only after burn testing is complete, in a controlled environment.
Should pillar candles achieve a full melt pool?
Many makers leave about ¼ inch (6 mm) of side wall to reduce the risk of spillage. This is a design choice. Always burn pillar candles on a heat-safe tray or holder.
Any time you make a change to your formula—wax, wick, fragrance, or container—burn testing should be repeated. Consistent testing ensures safer candles and a better experience for your customers.