
An off-center wick is the most common beginner flaw, and it causes real problems: one side of the wax melts faster, the container heats unevenly on one side, scent throw drops, and wax gets stranded on the far side of the jar. The good news is that centering a wick is a thirty-second job with the right method, and a crooked wick can usually be fixed. This guide covers the main methods, when to use each, and how to rescue a wick that drifted.
What You’ll Need
- Wicks with tabs, sized for your container
- Wick stickers (adhesive discs for the wick tab)
- A wick holder, centering device, or a pair of chopsticks or pencils
- Containers, clean and dry
- A ruler or a simple centering guide, for your first few candles
Step 1: Find the Center Before You Stick Anything
Look at the container from above and find the true center. For your first few candles, measure: mark the middle of the diameter with a ruler, or set the container on a printed centering guide. With practice your eye gets reliable, but measuring early builds the habit. A wick that looks centered from one side can be off when you check from the other, so look from two angles before you commit.
Step 2: Fix the Wick Tab With a Sticker
Peel a wick sticker and press it firmly onto the bottom of the wick tab. Lower the wick into the container, press the tab hard onto the center of the bottom, and hold it for a few seconds. The sticker keeps the tab from sliding when hot wax hits it, which is the moment most wicks drift. Pressing firmly matters: a lightly stuck tab will float free in the pour.
If you do not have wick stickers, a small drop of hot wax or a dot of high-temperature adhesive under the tab does the same job. Let it set before you pour.
Step 3: Hold the Wick Upright While You Pour
A sticker fixes the bottom, but the top of the wick still needs support while the wax sets. Use one of these:
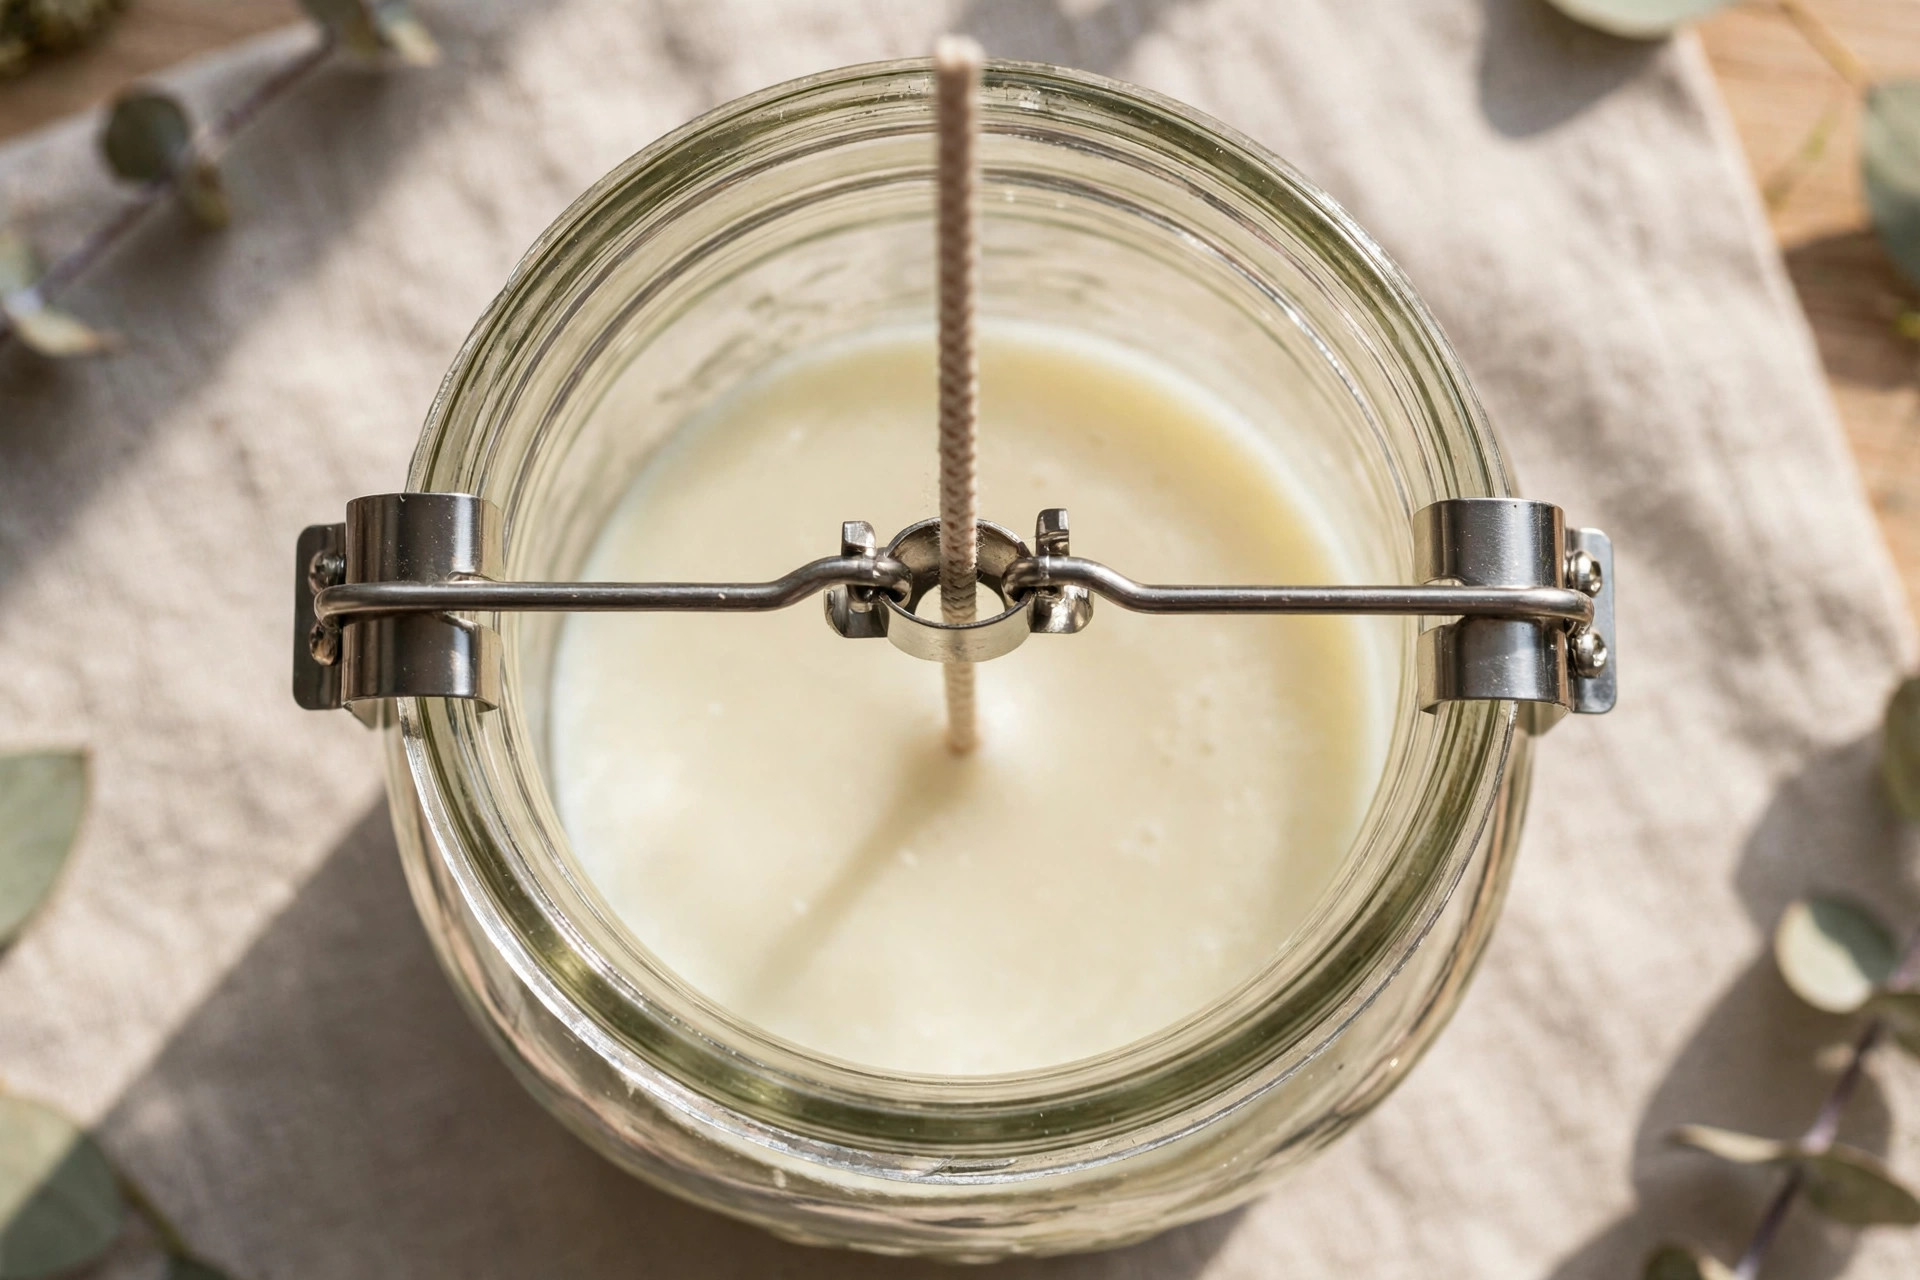
A wick holder or centering device. A small bar or frame that sits across the top of the container and grips the wick in the middle. This is the most reliable method, especially for wider jars, and it keeps the wick straight through the whole cooling period. Leave it in place until the wax is fully set.
Chopsticks or pencils. Lay two chopsticks or pencils across the top of the container and trap the wick between them, or wrap the wick once around a single chopstick laid across the rim. This costs nothing and works well for standard jars. Make sure the chopsticks sit flat and do not roll.
A clothespin or clip. For narrow containers, a clothespin clipped to the wick and resting on the rim can hold it upright. Check that the clip does not pull the wick to one side.
Whatever you use, check the wick from above after the holder is on. The holder keeps a centered wick centered — it does not fix a wick that was placed off-center.
Step 4: Check Again While the Wax Is Liquid
Pour slowly, then look from above before the wax starts to set. If the wick drifted during the pour, nudge it back to center with a chopstick while the wax is still liquid. This is your last easy fix — once the wax firms up, moving the wick takes more work.

How to Fix a Crooked Wick
While the wax is still liquid: nudge it straight with a chopstick and re-check from above. This is the easiest fix there is.
After the wax has set but before the first burn: warm the top of the candle gently with a heat gun, just enough to soften the surface, then move the wick to center and hold it with a centering device until the wax firms up again. Work gently and briefly — you are softening the top, not remelting the candle. If you do not have a heat gun, a careful second pour of a thin layer of wax at pouring temperature, with the wick repositioned first, can also reset it.
During a burn, in a liquid melt pool: you can nudge a wick gently with a chopstick while the pool is liquid, then let the candle cool and check the position. Never reach into a hot melt pool with your fingers, and never move a wick in a candle that is actively flaming — extinguish it first, let it cool slightly, then adjust.
If the wick is badly off and the candle is finished: do not try to save it by burning. A wick pressed against the glass overheats one side of the container and can crack it. Remelt the candle in a double boiler and pour it again with the wick properly centered, or retire that candle to a wax melt.
Special Cases
Wide containers and multi-wick candles: wide jars often need two or three wicks spaced evenly, so the melt pool reaches the edges. Space wicks evenly rather than clustering them in the middle, and use a centering device or a holder for each wick. Wick sizing for wide containers is covered in the wick selection and test burn guide.
Tins: thin metal tins conduct heat fast, so a centered wick matters even more — an off-center wick can make one side of the tin uncomfortably hot. Use a sticker and a holder, and check from above.
Pillar molds: pillars use a wick pin or a mold with a centered hole to hold the wick. The principle is the same — center first, secure second, check before the wax sets — even though the tool is different.
Tips for a Straight Wick Every Time
- Center before you pour, not after. Every fix after pouring is harder than thirty seconds of care beforehand.
- Check from two angles. A wick can look centered from the front and be off from the side.
- Leave the holder on until the wax is fully set. Removing it early lets the wick lean as the wax contracts.
- Trim after setting. Once the wax is hard, trim the wick to one quarter inch so the first burn starts clean.
- Note what worked. If a holder works for your jars, keep using it. Consistency beats improvisation.
Safety
A wick against the glass is a safety problem, not just a cosmetic one: it overheats one side of the container and can crack it. Never burn a candle whose wick sits against the wall of the container. And never adjust a wick with your fingers in hot or liquid wax — use a chopstick, and extinguish the flame first.
Next up: your first real candle — the first soy candle walkthrough, where centering, melting, and pouring all come together.
Affiliate disclosure: this tutorial contains an affiliate link to Norden Candle Supply. If you buy through our link, we may earn a commission at no extra cost to you — it helps keep our tutorials free.
Get candle-making tips by email
Join the list for new tutorials, tools, and supplier deals — straight to your inbox.
Signed up between Oct 7 and Oct 28 and never heard from us? We fixed a glitch that was dropping signups — please sign up again!



