How to Make a Layered Candle
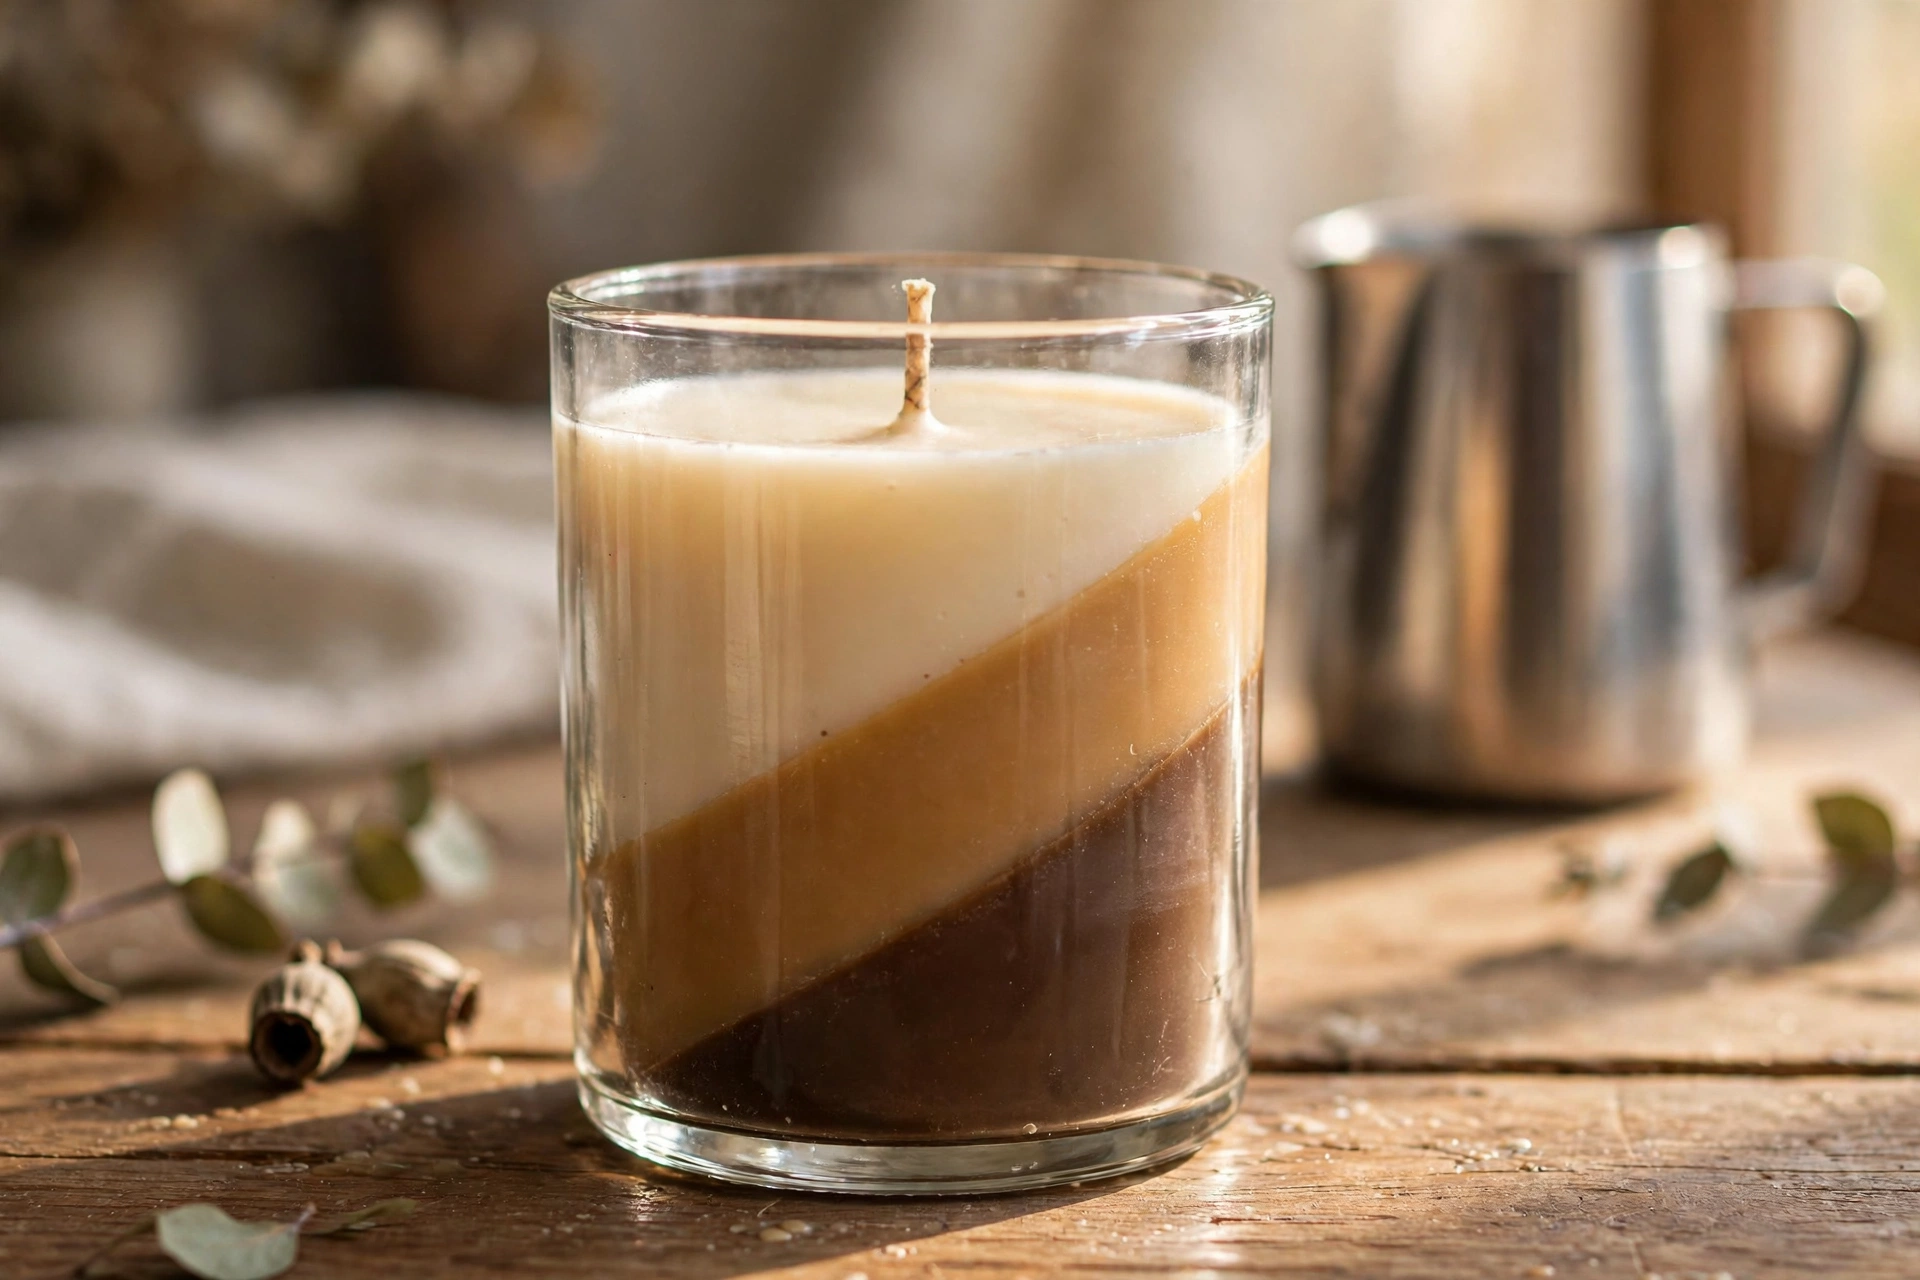
Diagonal stripes of color suspended in glass — layered candles look like they took all day. The secret is patience between pours and a tilted jar.
What you’ll need
- Container wax (soy or a soy blend)
- A clear glass jar — layers only show through glass
- Wick, sticker, and holder
- Fragrance oil (one scent for all layers keeps it simple)
- Candle dye in 2–3 colors, or one color in different intensities
- Pouring pitcher, thermometer, and digital scale
- A small bowl or mug to prop the jar at an angle
Steps
1. Plan your layers
Three layers is the sweet spot for a first attempt. Decide your color order — dark to light or light to dark both work. Divide your total wax weight by 3 so each layer gets an equal share. Scent all the wax with the same fragrance so the candle smells consistent as it burns down.
2. Wick and pour layer one
Center your wick. Melt the first third of your wax, add FO and your first color, and pour it into the jar tilted at roughly 45° — nestle the jar in a bowl or against a mug to hold the angle. Pour just enough for one layer.

3. Let it set completely
This is the whole trick: the layer must be fully hard before the next pour, or the colors bleed together. Give it at least 1–2 hours at room temperature. The surface should be firm and cool to the touch.
4. Tilt the other way, pour layer two
Flip the jar to tilt the opposite direction. Melt your second third of wax with the second color (same fragrance), cool it to about 130–140°F — cooler than a normal pour, so it doesn’t melt layer one — and pour gently.
5. Straighten up for the final layer
Once layer two is fully set, stand the jar upright and pour the final layer. This caps the design and gives you a level top for a clean finish.

6. Cure and admire
Cure 7–14 days like any soy candle. The layers are purely visual — the candle burns exactly like a single-color pour, revealing each stripe as the melt pool descends.
This tutorial contains affiliate links. As an Amazon Associate I earn from qualifying purchases — it helps keep these tutorials free, at no extra cost to you.